Translating GiveWP
GiveWP is fully internationalized and “translation ready”. Our available languages is growing continually, but you might find the need to provide your own localized language for your website. This article gives you an overview of how to do that.
Articles in this section:
 Translating GiveWP with Loco Translate
How Translations in Plugins Happen
Language translation sounds like a very daunting challenge for WordPress plugins. But in the end, it’s relatively straight forward. GiveWP is built in U.S. English and comes with a “.po” file that lists all of the strings of text used throughout the entire plugin.
WordPress now ships all translations to users as updates, the same way you get plugin or theme updates from WordPress.org. This is through a platform WordPress developed called Glotpress. That whole system is now hosted on WordPress.org and manages all plugin translations, including for GiveWP. This enables people from all over the world to contribute to plugin translations and then to have those translations shipped to everyone using that plugin in that given language.
Here is where the GiveWP translations happen. These translations are only shipped to users who have that language installed on their WordPress website. Further, translations are only shipped once they have reached 95% complete for the stable version of the plugin.
Contributing your local language for GiveWP is relatively easy. On the GiveWP translation page, search for your local language and click on the title. From there click on “Stable (latest release)”. You’ll then see a long table showing all the language strings available for translating.
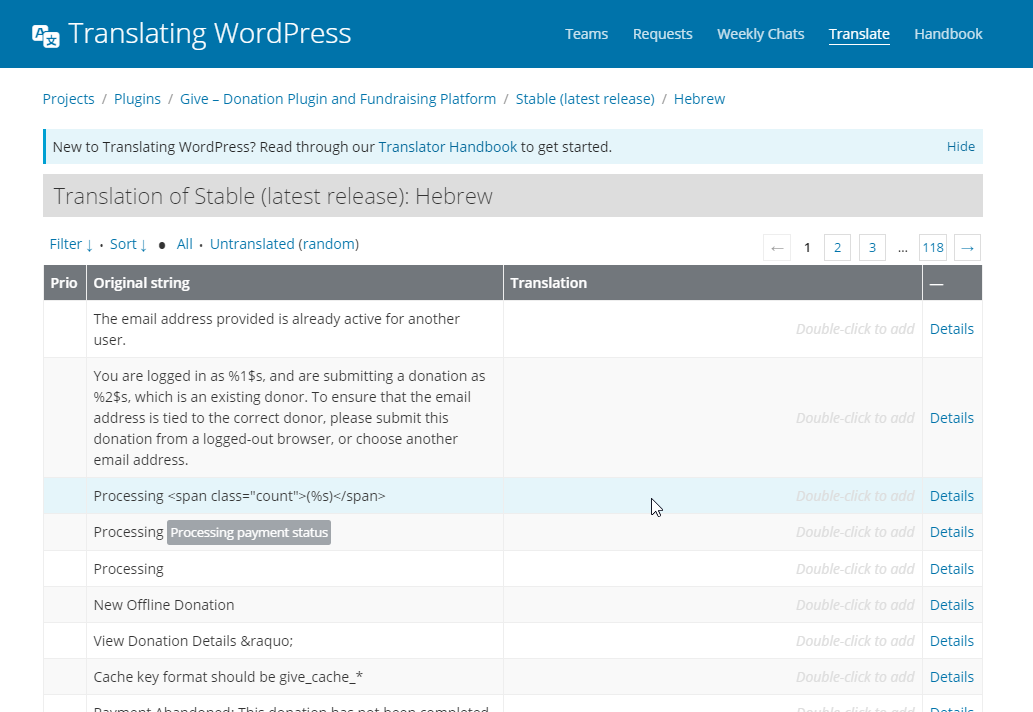
From there you can double-click on the cell to the right of any language string and add your translation.
The Translation team for that language will review your translations. If they are approved and the translation reaches 95% or more, then it will become available for all users of that language to benefit from.
Translating Locally
There are times when you want to do your translation locally first. You might want to translate the plugin for your website in order to confirm that it communicates well both on the Admin and front-end. Another reason you might want to translate locally is because our Add-ons are not hosted on WordPress.org and you may need their strings translated as well.
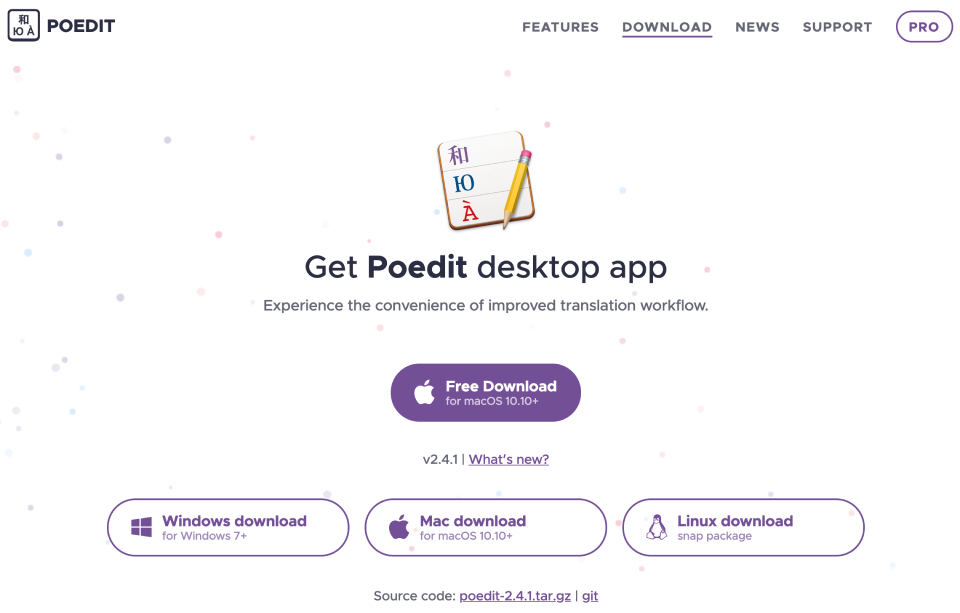
For translating locally we highly recommend using PoEdit. WordPress.org has a very handy guide to creating plugin translations with PoEdit. Review that here, and then continue below with how to incorporate your translation into your website.
What are PO and MO files?
Translations in WordPress are handled in part by three different file types: PO, MO, and POT.
PO is an acronym for a Portable Object. PO files are commonly used in software development to designate files that are read by the computer. In the case of plugin translation, PO files hold all of the original and translated strings from a plugin in a way that the computer can compile them.
MO is an acronym for a Machine Object. MO files hold the translations for your site in a different format from PO files. They perform similar functionalities as the PO file, with the main difference that they are not readable by humans.
POT is an acronym for Portable Object Template. As the name suggests, the POT file is a template for PO files. It contains the original strings to be translated, but not the translated strings. POT files are used to generate PO and MO files for specific languages.
WordPress plugins and themes must provide their own POT file and keep it updated with the latest translatable strings. There are various tools for creating PO and MO files. This article covers the most popular: Poedit.
Using Poedit for Local Translations
Poedit is an open-source translation file editor for localizing software which is used in WordPress plugins such as GiveWP, and WordPress themes. Poedit uses gettext, which is a system commonly used for writing multilingual programs, enabling internationalization and localization, and it’s available for Windows, macOS, and Linux.
Using Poedit software, you can download POT files containing the original text strings for GiveWP and its add-ons and then create a .PO and a .MO files for your website.
Download and Install PoEdit
You can download the Poedit software directly from their site here: https://poedit.net/download.
Open the GiveWP POT in Poedit
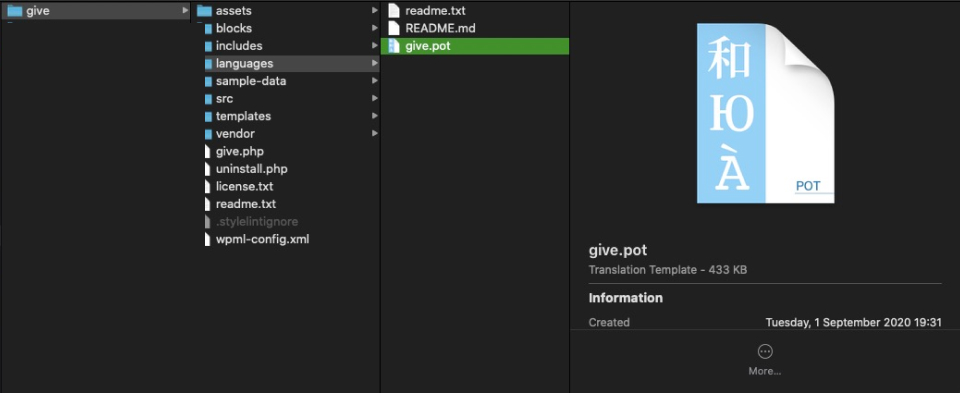
In order to create a .PO or .MO file with Poedit, you need to have the GiveWP plugin downloaded somewhere on your computer, for example in your “Downloads” folder. Do to that, navigate to the GiveWP plugin page, and click on the blue “Download” button. That will download the latest version of GiveWP to your Downloads folder.
Unzip the GiveWP zip file, and you’ll see a sub-folder called “/languages”. That’s where you’ll need to look to edit the strings in Poedit.
Opening a GiveWP Add-on POT file
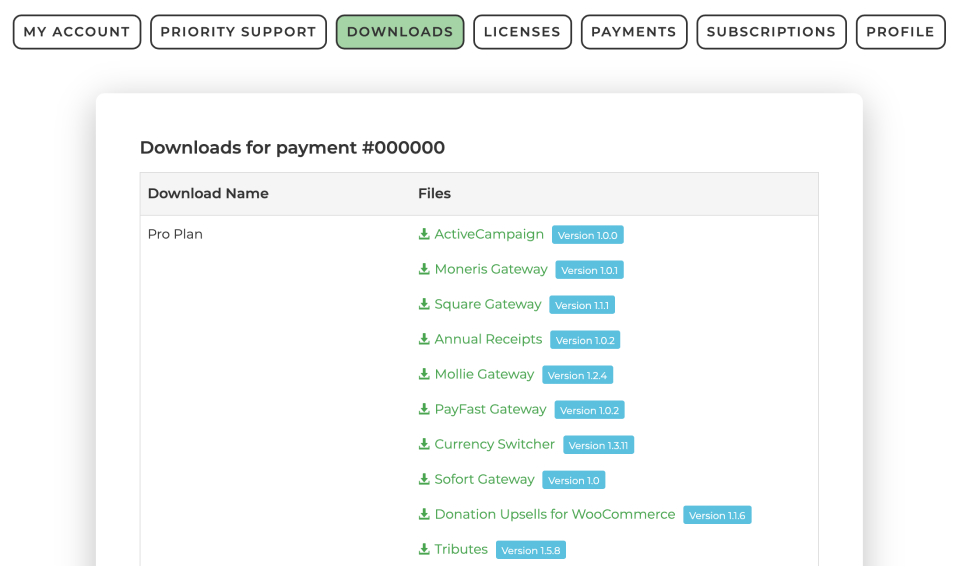
To get the POT files for any GiveWP add-on, navigate to your GiveWP.com account page, and then click on Downloads. You’ll be presented with a full list of all the add-ons available on your plan, so you can download the add-on you want to translate.
After you download the add-on, unzip it, navigate to the add-on folder, and then open on the languages folder and the POT file. Now that you know where to find the add-on POT file, you can easily open it in Poedit to create your local translation files.

Translating the POT files using Poedit
Now that you have Poedit installed on your computer and the GiveWP POT file (or add-on POT file), you need to open Poedit.
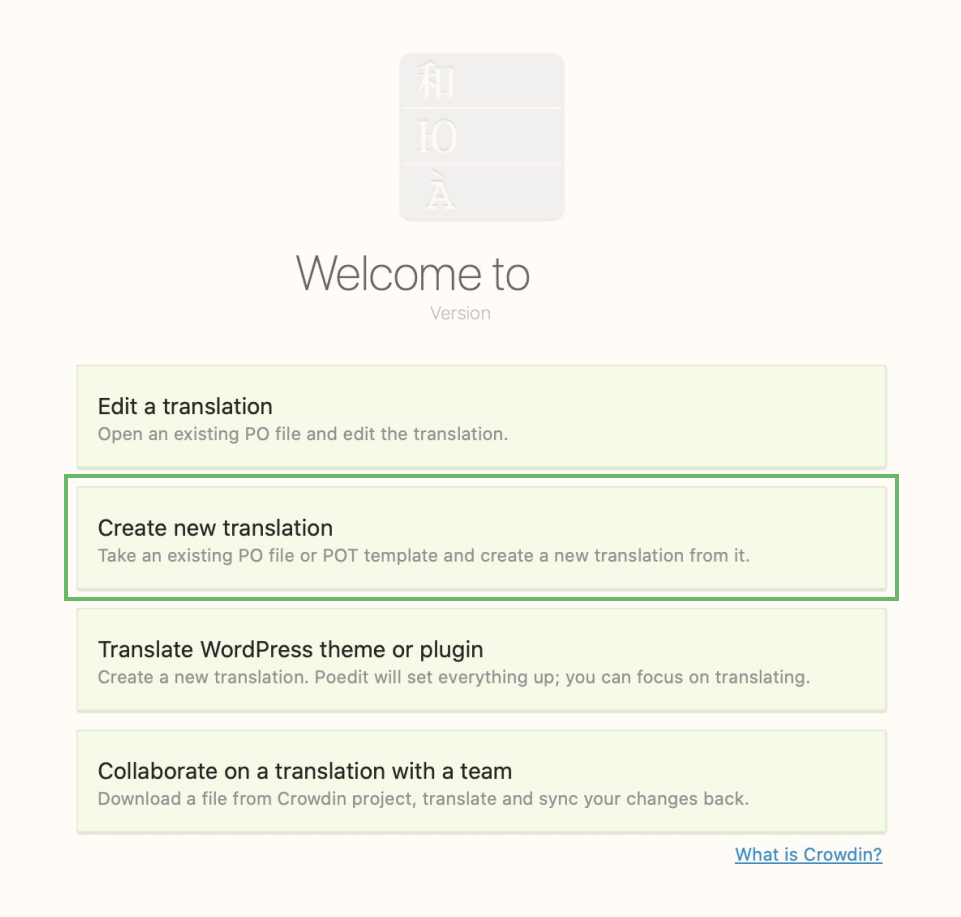
Select Create new translation, which will let you take an existing POT file and create a new translation from it.
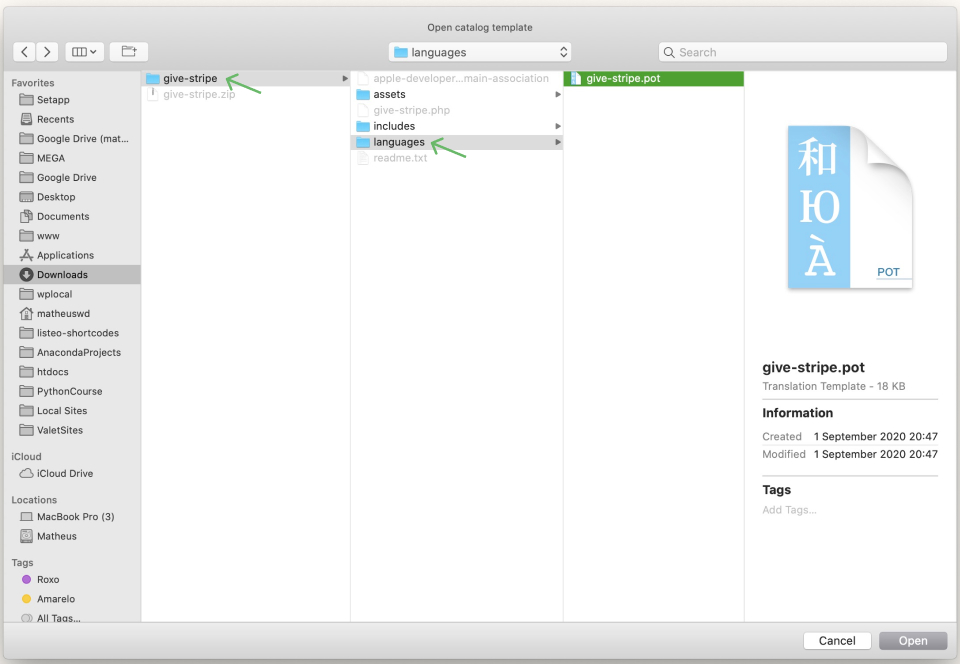
When you click on this option, you’ll need to look for the POT file of the plugin you want to translate. This example uses the Stripe add-on so that the languages folder will be inside of the main plugin folder:
Note: When you download a new language for WordPress in the settings at Settings > General > Site Language, that pulls in the PO and MO files that are named according to the locale into a folder at wp-content/languages. The naming structure for the locale is based on the language code (for example,es for Spanish) followed by the country code (e.g. _ES for Spain or _MX for Mexico). So, the Spanish Spanish locale is es_ES, while Mexican Spanish is es_MX. If there’s no Mexican Spanish (es_MX.po/mo) file, but there is a generic es.po/mo, it will be used as a fallback.
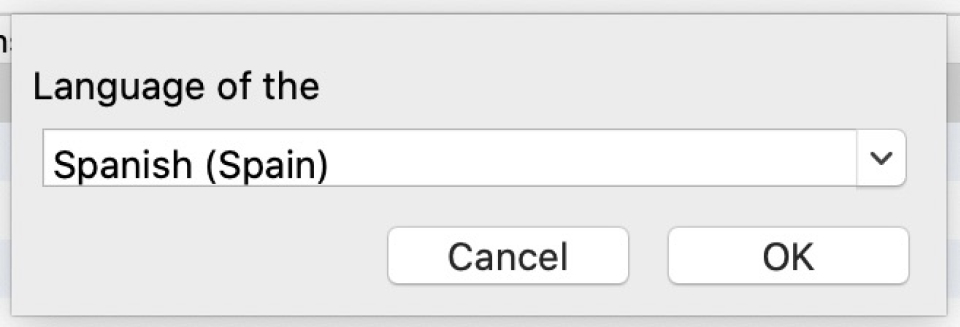
As soon as it is opened on Poedit, you’ll be asked which language you want to translate the plugin into. Here’s what it looks like to select Spanish from Spain. This is very similar to the dropdown in the General WordPress settings.
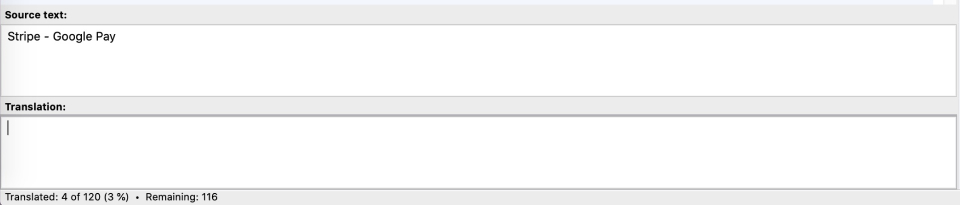
Now you should be able to translate all the strings that are available in the plugin. For each translatable string, the top box is the source text and the bottom one is an input field where you can edit the translation. Translate the text and then select another string to keep translating.
When you have all the strings translated (or at least all the ones you want to translate), you need to generate the PO and MO files. To generate the PO file, click on File > Save and then the most critical step: rename the file.
The file name should contain the name of the folder of the plugin (in this case, give-stripe) plus the locale (in this case, es_ES). The name for the Spanish translation became now give-stripe-es_ES.po.
If the name does not exactly match, translations will not be applied. Ensure that dashes and underscores are exactly as shown in that example.
When you save the PO file, the MO file will also be generated and it will be named the same as the PO file (give-stripe-es_ES.mo). If the MO file is not generated, you can click on File > Compile to MO and save it in the languages folder.
The last step is to upload both PO and MO files to your server. You’ll need to access your server preferentially via SFTP and then upload both files to the languages folder under wp-content/languages/plugins/. For the example above, the full path would be:
- wp-content/languages/plugins/give-stripe-es_ES.po
- wp-content/languages/plugins/give-stripe-es_ES.mo
Implementing your GiveWP Translation into your Website
Now that you have your translated files, you’ll need to upload them to your website. Here’s the steps:
Change the file name of your PO and MO files
In order for GiveWP to recognize your file as a valid localized language to be used on the site, it has to have a very specific file name. After you’ve saved your PO and MO files from PoEdit, you need to change the file name like the following (using standard German as an example):
- give-de_DE.mo
- give-de_DE.po
So the structure is “[give] hyphen [language code].file extension”. Here is a list of available language codes.
If you are translating a GiveWP Add-on, the name of the file must be the textdomain of that Addon. For example, our GiveWP Stripe Add-on’s text domain is “give-stripe”. You can find the textdomain of each of our Addons at the top of the readme.txt file. So, the GiveWP Stripe PO and MO files should be called:
- give-stripe-de_DE.mo
- give-stripe-de_DE.po
Implement your Translation on your Website
Now that you have your translation done, and the file names are correct, the last step is to upload them to your website.
- Login via (S)FTP, and then navigate to the “/wp-content” folder.
- Add a new folder there called “languages” if it does not exist.
- Inside the “languages” folder, add another folder called “give”.
- Upload the MO files there.
- You’re done!
Translating a GiveWP Add-on
The process is the same, but the language folder is different. The main file of every GiveWP Add-on will have a “Text Domain” in the header. This is the same as it’s folder “slug”. That’s the sub-folder name you need to use for the language file. Here’s some examples:
- GiveWP Recurring =
wp-content/languages/give-recurring/give-recurring-es_ES.mo - GiveWP Stripe =
wp-content/languages/give-stripe/give-stripe-es_ES.mo


